Whimsy Stamps ~ Instagram Hop with Ranger Ink ~ Flickering Candle
Hey crafty friends, you'll be forgiven for thinking I'm using some fabulous Mica Spray on my project today from that title, but nope, in fact, it's titled for the actual flickering candles!

I'm back as promised with my second creation for the Halloween Hop we're doing today with the fantastic folks at Ranger Ink. They are sponsoring our hop with a $50 Gift Certificate to their range. One lucky randomly drawn winner will win the Ranger Gift Certificate and also a $50 Gift Certificate to Whimsy Stamps. A second lucky winner will win a $50 Gift Certificate to Whimsy Stamps. So come hop along with us to be in with a chance to win! The Hop is hosted over on Instagram, so be sure to leave your comments there.

For my second creation for the Hop, I decided I wanted to decorate some votive candles, so bought a set with plain glass containers and grabbed my Ranger Alcohol Inks to have a play. I pulled out lots of colours, but ended up just going with the first three colours I tried, because I really liked the Autumnal (and slightly spooky) palette.

I did a couple of different techniques, first dripping the inks over the base of each votive and letting it drip down the sides in whatever patterns it naturally fell. I got some quite different results. I lined my Ranger Non Stick Mat with plastic wrap for easy clean up, but the puddles of ink that gathered gave me the idea to turn the next three votives over and using the plastic wrap, add the ink to the sides of each votive, holding and squishing the ink on until it was covered in a fun pattern.

I created the diecut wraps for the votives in a black cardstock to create a simple silhouette design that would cast shadows that would dance and move with the flickering candles. I chose a couple of main Whimsy Die Sets to work with. The Haunted Graveyard Border Die was a good size for the votives with its fabulous tree and graveyard scene and haunted house. So I cut a few of these and trimmed away the overlap. It left the house and one tree essentially. I added glue to the ends and held that in place for a few minutes to let it grab. The designs I did like this were pretty quick to prepare, a great die set for this crafty make.
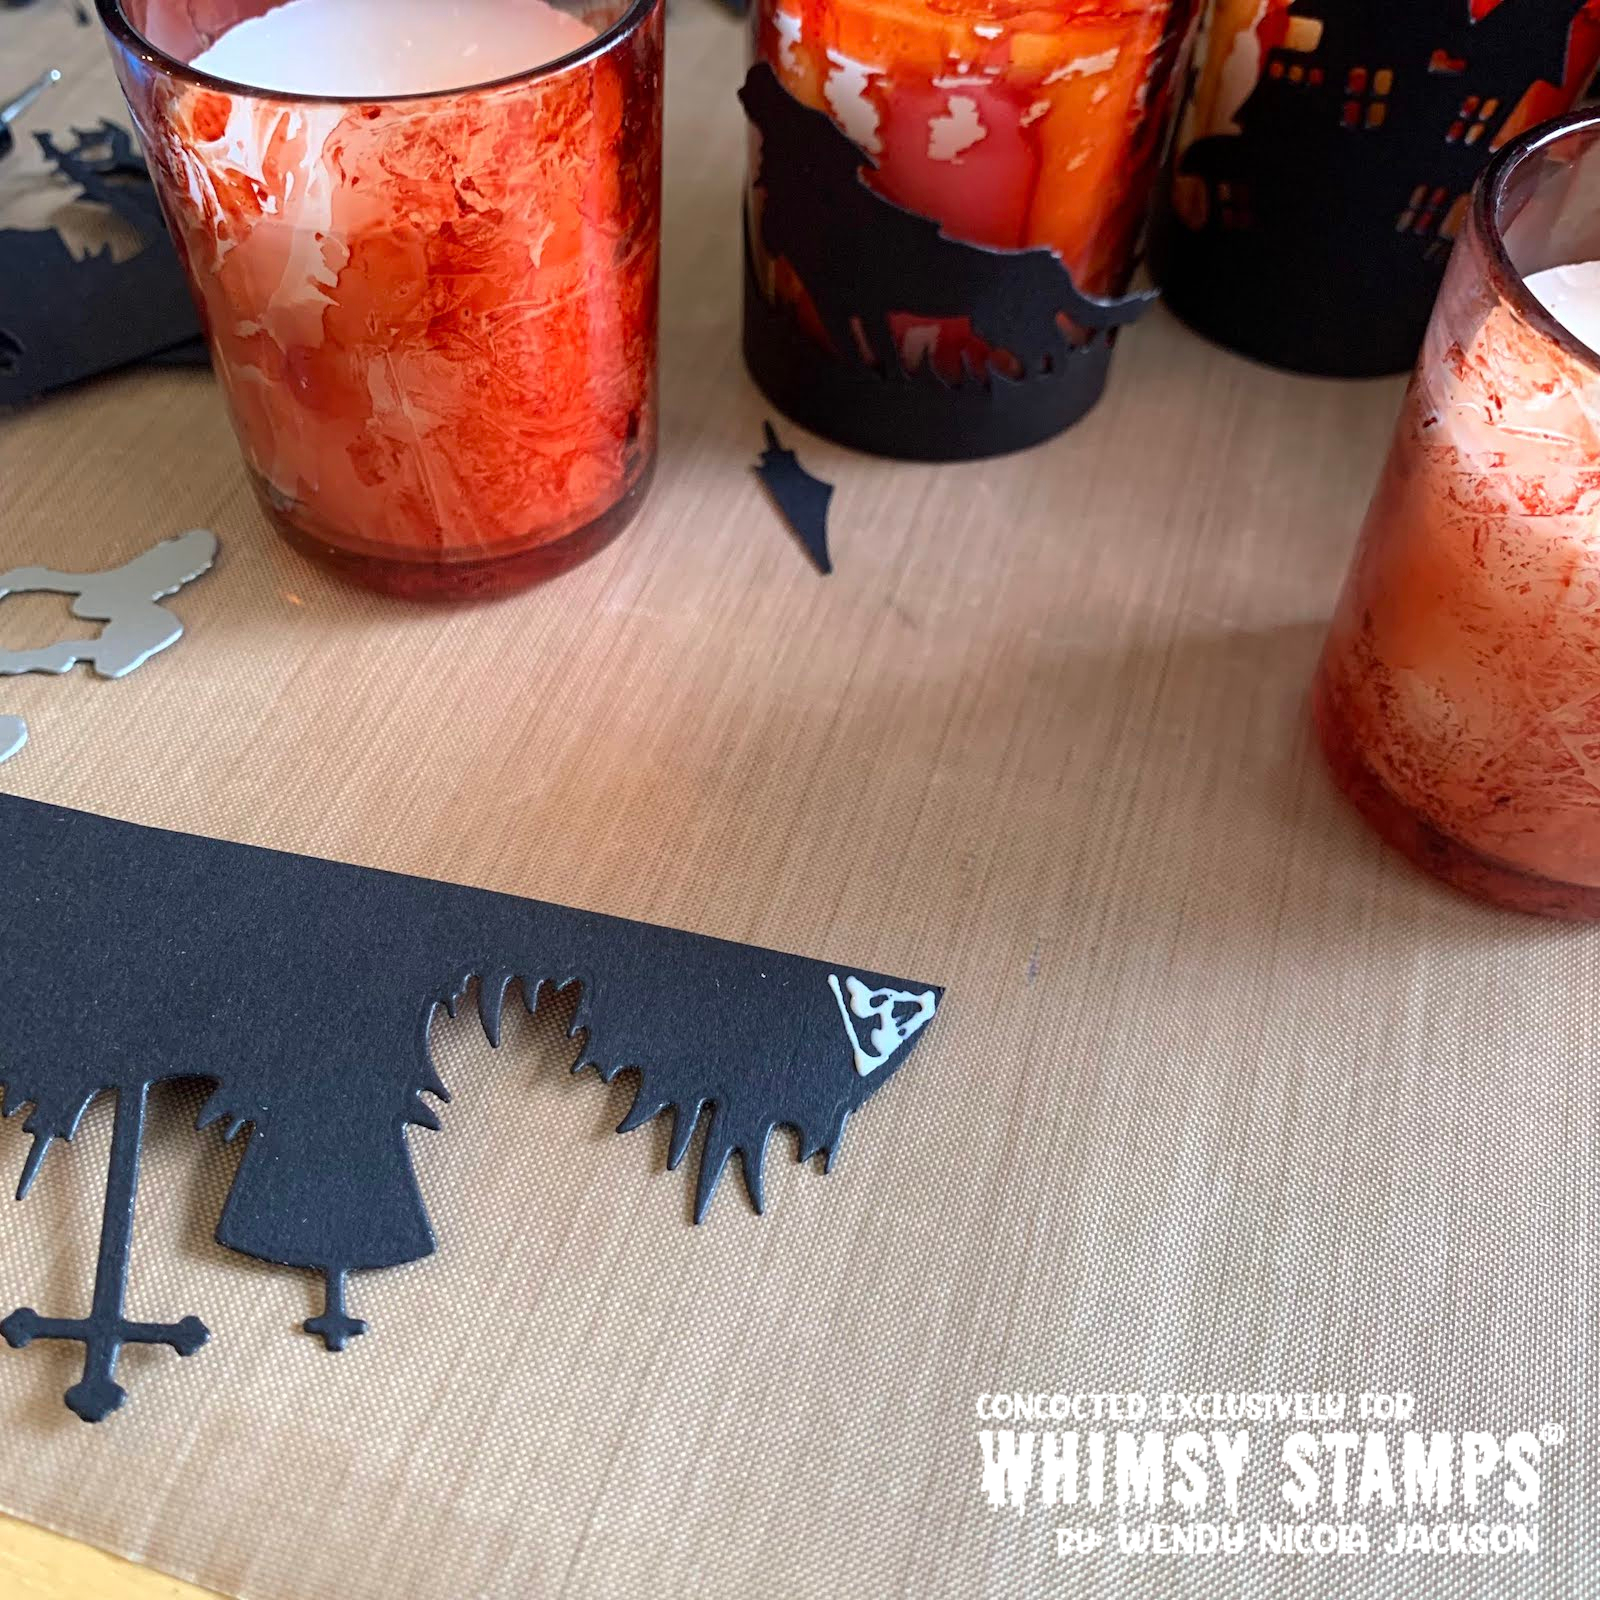
The other ones took a little more thought. I wanted to create a couple of scenes with the wolves from the Howling Night Die Set but needed to set the scene for them, so paired them with the grassy scene with the cross and tombstone from the same set. I had to do some partial diecutting to achieve the uninterrupted wrap of diecuts.

I bought some smaller die plates some time back to make partial diecutting a little bit easier. They're slightly thicker than my main plates, so I just pulled out the thin die adapter plate and added a little plastic shim to get the thickness just right. It worked a treat. I didn't add the plastic shim in the picture above as it obscured the die and I wanted to show how the die lined up. So this cuts everywhere except what is not under the plates and therefore doesn't cut the bottom of the wolf, leaving him attached to the base of the wrap. I cut some tufted grass after the wolf and you can just see the tombstone scene right before him. I made two wraps like this, one with each wolf.

One of the votives that I used the plastic wrap method on, came out looking like a crime scene! At least according to my hubby. Which gave me the idea to use some of the little outlines from the Zombie Party Outline Die Set. I chose the three I felt had the most recognisably Zombie poses and created that wrap using the same partial diecutting method as I used for the wolves. I love how it turned out and could easily have done a whole set just with those dies, so fun! But I'd created six little votives scenes by that stage and was really happy with how they turned out, so thought it was time to call it a wrap, hehe, pardon the pun!

I hope you've enjoyed seeing my two creations for the Whimsy Stamps and Ranger Ink Hop with the Halloweeners. I really did have such fun creating both of these Halloween Décor items and it's definitely starting to look quite well decorated for Halloween at mine now!

Do remember to come visit us over on Instagram for your comments to be counted towards the prize. It's such a fabulous one, so well worth a visit! You can start here at the Whimsy Stamps Instagram Account. Do you decorate for Halloween? I'd love to know what you've created as Halloween Décor. I'll be back with another crafty adventure very soon. Hugs, Wends xoxo


(I use affiliate links where possible, which helps the companies I design for to improve their marketing practice. I receive a small commission, which costs you no extra whatsoever, but helps these companies see where their marketing efforts are most effective and is a way they can say 'thank you' to and support their hard working affiliates and design team members. I only design for companies whose products I absolutely love and buy for myself. My opinions are always my own. If you're new to Whimsy please feel free to use the Whimsy Stamps discount code in my sidebar if you're doing some shopping and remember to check out their retiring section, the deals are phenomenal!)
Challenge Entries:


Comments
hugs
lorraine x