Whimsy Wednesday ~ Penguin Skiing
Hey there lovely crafty pals. I'm here with a super cute and very fun kinetic creation today. I've used a whopping 7 different Whimsy Stamps items in this creation and had such a blast making it. I've even taken a little video of the kinetic element of this creation in action. You can click the video below for a peek at that.
I started my creation with the idea that I wanted this cute lil' skiing penguin, a gorgeous Winter stamp by Crissy Armstrong, to move down the card as though he was skiing down a slope. Now this is really easy to bring to life through the Slip 'n' Slide Dies designed by Nina-Marie Trapani for Whimsy Stamps. I wanted to obscure the channel, so it wasn't overly obvious and the easiest way to do this, is to glue down the little strip of paper to the base of the card, that is cut away when creating this channel. This gives a continuation in the paper design and makes it less obvious that there is a channel there.

To create the channel and ensure that the kinetic element slides freely, I did a few things to assist this. The first was to choose a thin foam that toned with the beautiful snowflake papers by Crissy Armstrong that I used as the scene base. This ensures that if any is visible through the channel it doesn't make the channel obvious by being a different colour. I just use coloured foam from the kids craft section for this. It's great and comes in lots of colours.

I freehand traced around the channel by first lining up the channel waste in the paper and laying it over the foam. I carefully removed the main paper leaving the channel in place and then traced around it. I cut into the foam with scissors and allowed a small margin all around the sides of the channel, so the kinetic discs can slide freely, then cut away the foam to leave a slightly larger foam channel.

After this, I set aside the foam, and put the paper back together with the channel that was cut. I then added liquid glue with a Zig Glue Pen and very carefully turned it, keeping the paper and channel together, laying it over the white base layer of the card and adhering the glued channel waste to the white base card. I lined it all up very carefully so it was nicely centred before pressing down the little wiggly strip of channel waste, to create that base layer, that keeps the paper design continuity when the card is finished.


I added glue tape all over the base of the foam, paying careful attention to bring the tape right up around the foam channel edges, so it adhered well to the base and wouldn't be loose and interfere with the sliding mechanism. I then did exactly the same to the top side of the foam, which was cut slightly narrower around the sides than the designer paper and finally brought the paper over it, lining up the diecut waste from the channel to fit directly beneath the raised foam and paper layer. This gives a really lovely continuous paper effect and makes the channel less obvious, giving a nicer finish to the card.

The little discs to create the slider are part of the Slip 'n' Slide die set. I cut them from some firm waste acetate packaging, then stuck them together with a tiny circle of double sided adhesive foam that I used a standard size hand held hole punch to make. You could just use a firm cardstock for this, but I like the way, the acetate slides so freely over the base paper. I printed the beautiful Winter's Magic Blue Digital Papers by Crissy Armstrong on 250gsm cardstock, so it was heavy enough to carry the slider mechanism without buckling.

This adorable Whimsy Stamps penguin image is by Crissy Armstrong and is called Penguin Skiier 2. I've coloured him with my Copic Markers. I added a tiny bit of Wink of Stella to his ski goggles for a little bit of sheen and that was him done. I love his yellow scarf and hat. I thought it was such a fun joyful colour for this creation. I think he's utterly adorable!

I created a snowbank which I'd embossed with two different folders for a bit of fun and then added a little cluster of trees at the top of the snowbank and one down the bottom. I used the cute little tree die from the Camper's Road Trip die set. It's only available now in the June Bonus Bundle, but if you're keen on that and the Slip 'n' Slide die set too, it's a steal, as they're both in this Super Saver set.

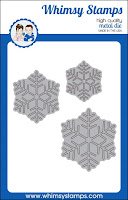
I've used two lovely dies to create the sentiment. The Christmas Large Word Die and one of the words from the Wonderland Word Die Set. I cut them from silver glitter cardstock for a bit of bling and sparkle. I adhered them to the paper with Zig Glue Pen. The final touch was to add a snowflake from the Snowflake Dies by Nina-Marie Trapani. I added Wink of Stella to it, but felt last minute it needed a little something else, and added a tiny sparkly gem from Rosie's Studio Glass House range.

If you made it all the way to the end of this mammoth post, well done and thanks for bearing with my extensive explanations. The thumbnails at the end of the post will take you straight through to the store for a closer peek at the elements I used for this card. I hope you enjoyed seeing how this kinetic card was created.

Do pop over to the Whimsy Stamps Facebook Group where there is a constant stream of lovely inspiration from the Wider Whimsy Design Team. They're such a talented team, and you're sure to be inspired by their gorgeous creations. I'll be back again soon with another crafty adventure. Hugs and happy crafting xoxo


Challenge Entries:
Craft Rocket: #51 ~ Anything Goes
Lemon Shortbread: #73 ~ Anything Goes
Back To Basics: #9 ~ Use A Digital Image
Always Fun Challenges: #70 ~ Let It Sparkle
The Paper Shelter: Summer ~ Anything Goes
Lil' Patch of Crafty Friends: #87 ~ Anything Goes
613 Avenue Create: Magic or Fantasy (I think a skiing penguin is pretty fantastical! LOL)


Comments
Kath x
hugs
Chris
x
Blessings
Maxine
Thanks for joining in at BBB and good luck, Kate x
Sandy DT
hugs