Whimsy Stamps ~ Cutest Easter Name Place Markers
Hey crafty friends, I'm back with another cute Easter project. I made these adorable little Table Place Markers for the younger kiddos in the family using a mix of die sets from Whimsy Stamps. I've made four of these little personalised place markers for the kids and I must say, I totally adore how they came out!

I used the cutest die set from Whimsy to create these. I started with the little Bunny Butt Die Set, which has a cute but smaller body, so I swapped this out for a slightly larger oval shape to allow their names to fit. I used the second smallest plain oval from the Whimsy Spring Ovals Die Set. The cute feet and bunny tail are from the Bunny Butt Die Set and the ears are from the Penguin Pals Pretend Die Set. Whimsy has some seriously fun dies! I cut all the white bunny bits from Hammermill 100lb Cardstock. I created the kids names with a newer die set from Whimsy, there are two versions, I used the first to create these. I got a little inventive to make the T and Z, but it wasn't hard, these sets are so cool! I used Ballet Slipper and Powder Cardstocks form Concord and 9th to diecut the kids names for their place markers. I used two very soft pink Promarkers to add the colour to the bunny feet, Pink Mittens and Pale Blossom.

I added a little shading with Cool Grey Copic Markers, but these are otherwise pretty quick to whip up. So easy and so fun! A strip of cellotape on the reverse holds the little pads on the feet in place. I used a tombstone die from one of my Halloween die sets, to create the kick stand for the back of the place-cards, which worked a treat!

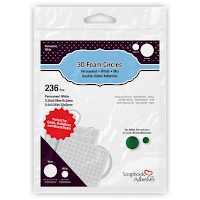
Their cute little fluffy butts were created with the tail portion of the bunny butt die set, which I added some 'Artificial Snow' to, to create the fluffy finish. I added them to the body with a foam circle for a bit of dimension and height. This was such a fun project and hopefully the kiddos will love them! They may even get a few Easters out of these.


What do you think of these wee place markers? I'm now thinking of the next celebration coming and what I can make for that! These were truly so quick and fun and I think the kids will really love them! So I'm inspired to make Table Place Markers again for another celebration.

Thank you friends for stopping in to visit, I wish you the most beautiful and restful Easter. May your cup be filled back up with love and family. Hugs, Wends xoxo


(If you like any of the elements I've created with, I've added thumbnails to make your shopping easier. I do use affiliate links where possible, which gives me a tiny commission but costs you no extra whatsoever, though more importantly it helps the companies I design for to improve their marketing practice and track my contributions. I am deeply grateful if you use them for these reasons. I only design for companies whose products I absolutely love and buy for myself. My opinions are always my own.)
Challenge Entries:


Comments